Every coach I have ever trusted says some version of the same thing: if you want better agility, earn it through control. Not just speed. Not just hops. Control.
Your “core” is that control center. It is the link between your hips and your shoulders, the part that keeps your torso from folding when you plant, spin, decelerate, absorb contact, or reach for a loose ball. And in real games, the best core work is rarely about doing a thousand crunches. It is about resisting motion, transferring force, and staying stacked when everything gets chaotic.
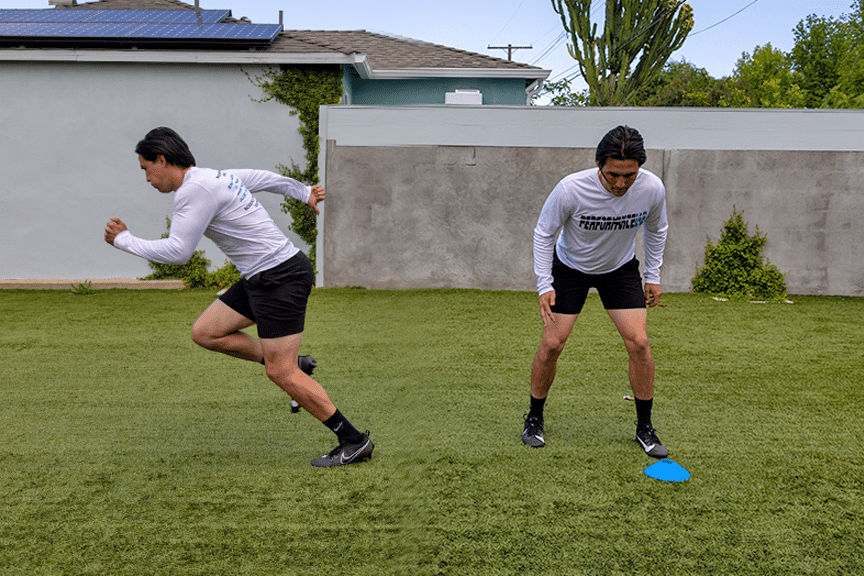
Below are 10 core exercises I love for athletes because they show up on film. In my experience coaching and training, you feel them in your first step, your change of direction, and your balance when you get bumped mid-play.
What “sport core” means
In most field and court sports, your core is working in three big ways:
- Anti-extension: don’t let your low back over-arch when you sprint, jump, or reach.
- Anti-rotation: don’t let your torso twist when you cut, throw, or take contact.
- Anti-lateral flexion (lateral stability): don’t collapse or “lean” through your trunk and hips when you land on one leg or slide defensively.
The exercises below hit those buckets on purpose, with plenty of single-leg and “moving athlete” positions.
10 core exercises
1) Dead Bug (slow and strict)
Why it translates: Teaches ribcage and pelvis control, which is huge for sprint mechanics and deceleration. If your low back over-arches, you leak power.
How to do it: Lie on your back, hips and knees at 90 degrees, arms up. Exhale, flatten your low back gently into the floor. Extend opposite arm and leg without letting your ribs flare or back arch. Return and alternate.
- Sets and reps: 2 to 4 sets of 6 to 10 reps per side
- Coaching cue: “Exhale like you are fogging a mirror, then move slow.”
- Progression: Hold a light dumbbell overhead or use a resistance band for the arms.
2) Front Plank with Reach
Why it translates: Planks are fine, but reaching makes it more athletic. You are resisting rotation while your base is unstable, like you would when hand-fighting, shielding, or bracing through contact.
How to do it: Forearms down, body long, glutes tight. Without shifting your hips, reach one arm forward slowly, pause, then switch.
- Sets and time: 2 to 3 sets of 20 to 40 seconds total
- Coaching cue: “Don’t let the hips tell on you.”
- Regression: Widen your feet for more stability, reach from a high plank (hands), or reach from knees.
3) Side Plank with Top-Leg Lift
Why it translates: This is lateral core plus glute med work. That combo is money for knee tracking and hip stability when you cut or land.
How to do it: Side plank on forearm, body in a straight line. Lift the top leg 6 to 10 inches without rolling backward.
- Sets and time: 2 to 4 sets of 15 to 30 seconds per side
- Coaching cue: “Zip up your ribs and keep the hips stacked.”
- Progression: Add a mini band around the knees or ankles.
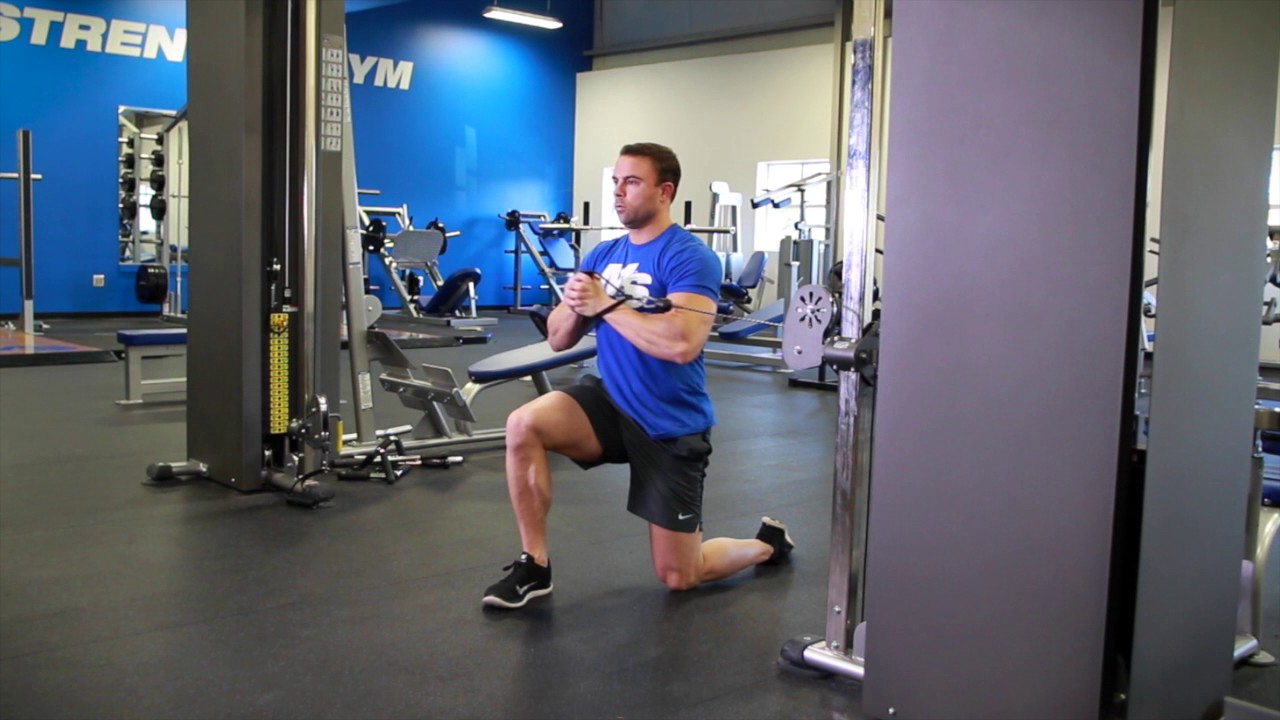
4) Pallof Press (half-kneeling)
Why it translates: Anti-rotation under tension. Think: holding your line while you pivot, absorb a shove, or sell a fake without spinning out.
How to do it: Anchor a band or cable at chest height. Half-kneel sideways to the anchor. Press the handle straight out and hold, resisting rotation.
- Sets and reps: 2 to 4 sets of 8 to 12 reps per side, with 1 to 2 second holds
- Coaching cue: “Ribs down, glute on the down knee tight.”
- Progression: Tall-kneeling Pallof, then standing, then split-stance with a longer hold.
5) Bird Dog Row (bench-supported)
Why it translates: Cross-body stability (contralateral control), the same coordination you need for sprinting and for staying balanced while reaching.
How to do it: Set your non-rowing hand and knee on a bench so the dumbbell can clear the floor. Extend the opposite leg long and keep your hips level. With your free hand, row a dumbbell toward your ribs without rotating your torso. If you do not have a bench or weight, do a strict bird dog hold instead.
- Sets and reps: 2 to 3 sets of 6 to 10 rows per side (or 15 to 25 second holds)
- Coaching cue: “Imagine a cup of water on your low back.”
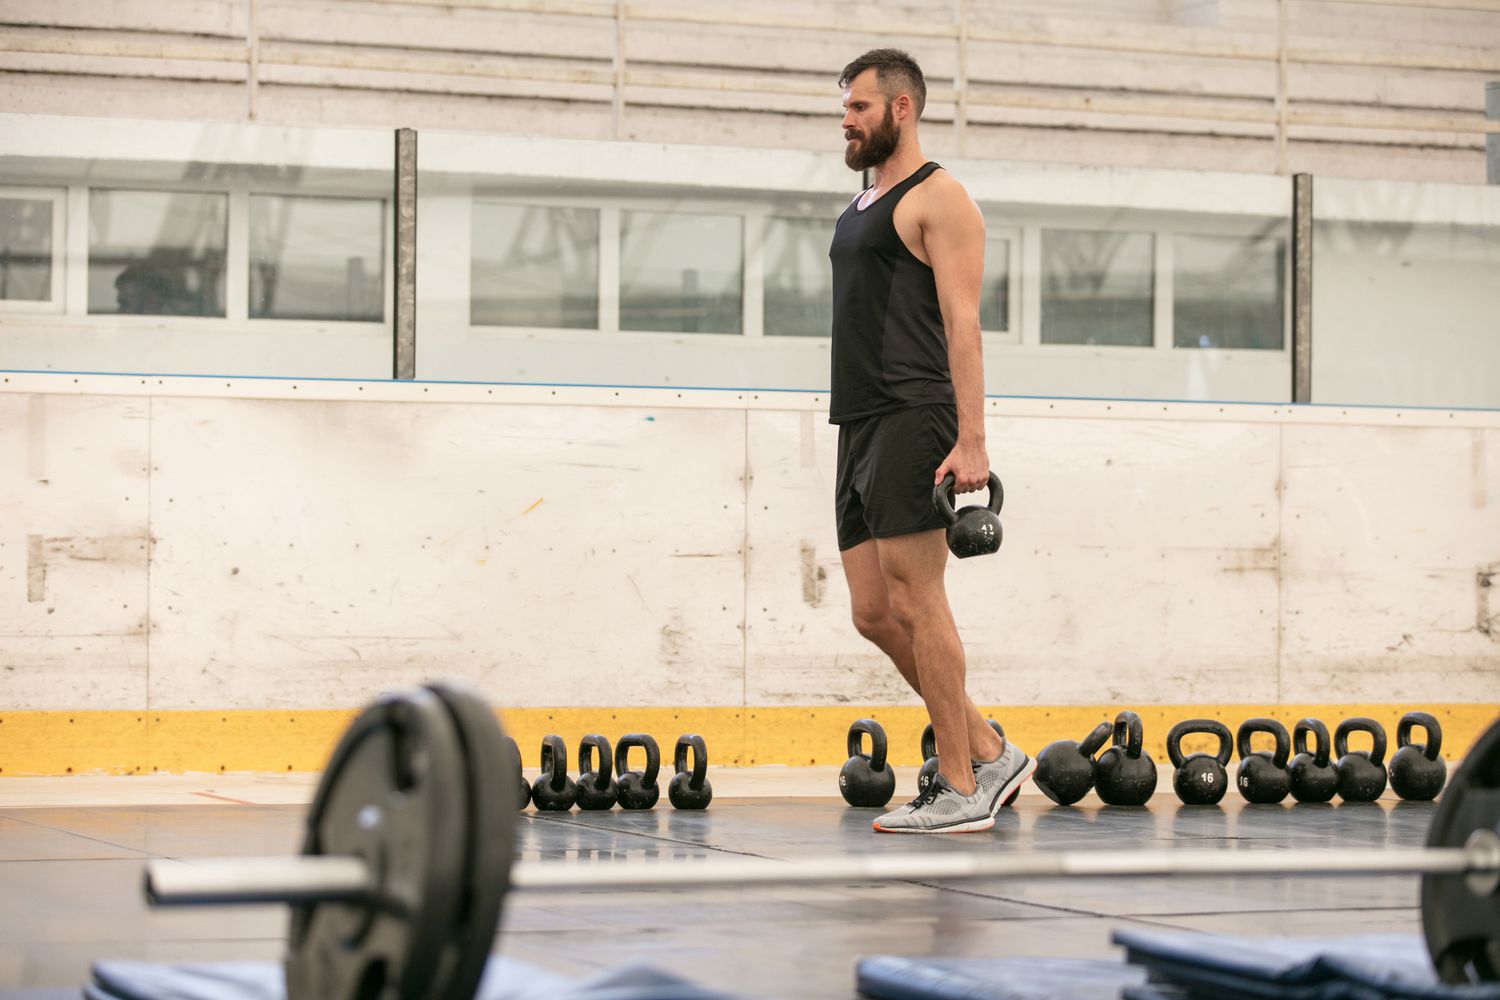
6) Suitcase Carry
Why it translates: Real-life anti-leaning. This is how you build the “don’t get knocked off your line” core for cutting and contact.
How to do it: Hold a heavy dumbbell or kettlebell on one side. Walk tall, slow, and controlled. No hip hiking, no leaning away from the weight.
- Sets and distance: 3 to 6 carries of 20 to 40 yards per side
- Coaching cue: “Grow tall through the crown of your head.”
- Progression: Add a slight march, or carry on a turf lane with controlled turns.
7) Copenhagen Side Plank (short lever)
Why it translates: Adductors plus lateral trunk. If you play a sport with cutting, defending, or change of direction, your groin is part of the core story.
How to do it: Side plank with your top knee on a bench (short lever). Lift your hips and hold. Keep the bottom leg relaxed under you.
- Sets and time: 2 to 4 sets of 10 to 25 seconds per side
- Coaching cue: “Drive the knee down into the bench and lift the hips.”
- Regression: Do a regular side plank first, then come back to this.
- Safety note: This can be high stress. Start conservative, progress slowly, and stop if you feel sharp groin pain.
8) Glute Bridge March
Why it translates: Hip extension stability while alternating legs, which helps your pelvis stay steady when you accelerate and when fatigue hits late in games.
How to do it: Bridge up, glutes tight, ribs down. Slowly lift one knee toward your chest without letting hips drop or rotate. Alternate.
- Sets and reps: 2 to 4 sets of 8 to 12 marches per side
- Coaching cue: “Hips stay level like headlights.”
- Progression: Put feet on a bench or add a mini band above the knees.
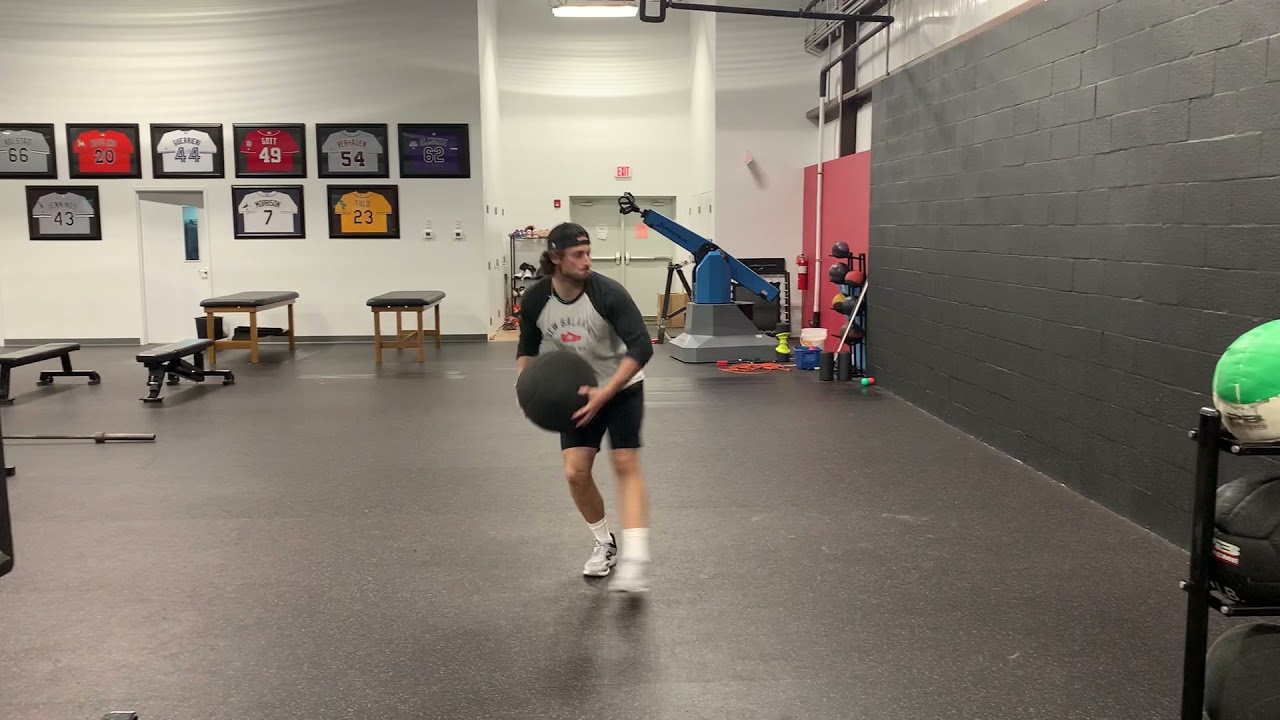
9) Medicine Ball Rotational Scoop Toss (controlled power)
Why it translates: You need rotational power in sports, but you also need to decelerate it. This teaches hips-to-core-to-hands sequencing without losing posture.
How to do it: Stand sideways a few feet from a sturdy wall. Load your hips, rotate through, and scoop toss the ball into the wall. Reset each rep with intent.
- Sets and reps: 3 to 5 sets of 4 to 8 reps per side
- Coaching cue: “Rotate through the hips, finish tall, don’t over-arch.”
- Note: Keep the ball moderate. Crisp beats heavy for most athletes.
- Safety note: If your back or hip is cranky, keep this lighter, shorten the range, or skip it and do more anti-rotation work instead.
10) Single-Leg RDL with Reach (bodyweight or light load)
Why it translates: This is balance, posterior chain, and trunk control in one rep. It looks a lot like the positions you hit when you plant, recover, or fight for space on one leg.
How to do it: Hinge on one leg, keep hips square, and reach your opposite hand forward (or toward the floor). Return with control, no rushing.
- Sets and reps: 2 to 4 sets of 6 to 10 reps per side
- Coaching cue: “Long spine, soft knee, hips stay square.”
- Progression: Hold a dumbbell in the reaching hand or add a brief pause at the bottom.
How to program it
You do not need all 10 in one session. Pick based on what your sport asks of you and what your body needs.
- Warm-up (5 to 8 minutes): Dead bug + glute bridge march + side plank
- Strength days (8 to 12 minutes): Pallof press + suitcase carries + Copenhagen holds
- Power days (5 to 10 minutes): Med ball rotational scoop toss + brief anti-rotation work
Simple weekly plan: 2 to 4 sessions per week, 3 to 5 exercises per session. Stay consistent for 6 weeks and many athletes notice cleaner deceleration and re-acceleration.
Quick progression (6 weeks)
- Weeks 1 to 2: Choose easier versions, shorter holds, lighter loads. Leave a rep or two in the tank.
- Weeks 3 to 4: Add 5 to 10 seconds per hold or 1 to 2 reps per set, or bump load slightly on carries and rows.
- Weeks 5 to 6: Keep quality high, add a harder variation (banded, longer lever, split stance) for 1 or 2 exercises per session.
Core cues and safety
Most “core tweaks” happen when athletes chase intensity with bad positions. A few reminders I use when coaching:
- Own your exhale: A strong exhale helps set your ribs over your hips so your core can do its job.
- Hips level, ribs down: If your hips are hiking or your ribs are flaring, you are compensating.
- Quality reps beat extra reps: When form slips, you are practicing the wrong pattern.
Quick safety filter: If a movement causes sharp pain (especially groin, low back, or shoulder), regress it or swap it. If symptoms persist, get a coach or clinician involved. Training through “spicy” positions is not toughness, it is just bad decision-making.
If you can keep your torso quiet while your limbs move fast, you are building the kind of core that shows up in the fourth quarter.
Quick FAQs
How long until I notice a difference?
Many athletes feel better control within 2 to 3 weeks, especially on single-leg work and carries. Bigger on-field changes often show up in 4 to 8 weeks, but it depends on your training age, consistency, sport schedule, and what you are already doing for sprinting, cutting, and strength.
Do I need equipment?
No. You can get far with dead bugs, planks, side planks, bridge marches, and bodyweight single-leg RDL reaches. If you can add a band, one kettlebell, and a medicine ball, you can level up quickly.
Can I do core every day?
You can do low-intensity core work often, but heavy carries, Copenhagen holds, and hard med ball work deserve recovery like any other training. Think 2 to 4 focused sessions per week.
The takeaway
Agility is not just how fast you can move. It is how well you can stop, control, and re-accelerate without your body spilling energy everywhere. Train your core like an athlete, not like a beach workout, and your balance will start showing up in every cut, every landing, and every scramble play you survive.